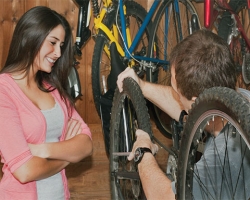
Think back to the purchase of a new bike or to a time when it was recently tuned – it could probably stop with a mere flick of a finger on the brake lever. Pulling the lever probably felt like using a mechanical device and not squeezing a stress ball. While not guaranteed, some simple adjustment, understanding and lubrication can often restore bicycle brakes to a crisp state. This article will not cover in-depth brake adjustment, but offer up a simple solution to a common problem of mushy brakes.
Most braking systems work by varying cable tension. Upon close inspection, one should observe that the engagement of pads against rims is caused by a connection of the brake arms to the lever arm on the handlebars by a braided silver cable – many little wires join as a larger, single one. This cable runs from the lever arm through housing (usually black but not always) to the braking arms, where a fixed anchor bolt clamps down the cable. Give the back brake a few squeezes and watch the pulling action of the cable through the housing. Try pulling on the cable in places where it is not covered by the housing, usually along the frame, to see the same effect.
It’s a pretty simple system, but has a few weak points that can be exploited over time to make braking feel less smooth. Usually, the back brake gets the most mushiness because it is farther from the lever arm than the front brake is. Over this distance, the cable is subject to friction with the housing. This causes the mushy experience. Bent or damaged housing or cable, gunk and grime all add friction to this system. The goal is to reduce this friction by removing any damage, and lubricating the line.
This fix will not require any tools, just some proper lubricating oil. Any light bicycle oil, like Triflow, works fine. Don’t use WD-40 for this. It is a solvent not a lubricant. Also, remember that this is supposed to be a quick fix. The goal is to make the cable move more freely through the housing. The case may be that the brakes need more adjustment than the scope of this article covers.
Step 1 – Check for areas where the housing or cable is damaged, bent or frayed. For the housing, look especially at points where it comes into contact with the frame and braking system. Little bends caused by poor routing are a common culprit. Try to bend these kinks back into shape. One might consider removing the housing all together and snipping off the problem bit, but this will require more time and be skill intensive, and could shorten the housing too much. It will also require some more tools. Flat spots, frays, and kinks in the cable where it enters the housing will cause friction. Changing the memory in the cable is difficult, so a tool or new cable is probably required if this is causing the problem. Still, give it a good bend and be careful.
Step 2 – Unhook the braking quick release if available. The goal is to create slack in the cabling system. If unaware how to do this or the bicycle lacks a quick release for the brakes, leave things as they are and try the gravity-assist option explained in the second part of step three.
Step 3 – The aim here is to get lube in the area where housing runs over the cable. After unlatching the braking quick release, the line should be slack and the housing should slide on the cable. Expose the areas of the inner cable that are usually covered and apply lubrication. Slide the housing on and off this area a few times to spread the lube evenly and wipe clean with a rag. If this is not possible, flip the bicycle upside down and stack the front or rear end with a chair, books, etc. to use gravity to work lube into covered areas. Drop by drop, apply lube to the points where housing terminates and the inner cable is exposed. Let gravity pull the lube inside here, and pump the brakes a few times to help it along. Adjust the orientation of the bike appropriately and be careful of shifting knobs and other delicate parts when laying the bike down.
Step 4 – Reseat the housing in its proper place and return the quick release to the closed position if removed.
Step 5 – Pump the brakes again and notice how much crispier that lever action feels.
Many common bicycle fixes require only some lube, minor adjustment and a clear understanding of what is going on. A tube of lube goes a long way with bicycles. Invest in some good stuff. It’s possible to apply lubrication to other moving parts on the brakes and bicycle, but be careful not to get any on the rims or pads. The same principle of cable and housing friction applies with shifting lines as well, so have a look at them once it becomes clear what is going on with the brakes.
Check up on the bike lubrication constantly, especially after rain and excessive riding. Apply lube every 200 miles or so, and be sure to wipe off any excess on the externals, as it attracts dirt.
Bike Safe, Bike Smart! is a weekly column to promote responsible cycling by providing information, education and advice about riding. It’s written by members of the Culver City Bicycle Coalition (CCBC), a local chapter of the Los Angeles County Bicycle Coalition. The CCBC hosts a family ride each month. For more information, go to ccbike.org.


